Showing posts with label .Net 6. Show all posts

Single Sign-On Using ASP.NET MVC And ASP.NET Core | RAJESH GAMI


What is single sign-on (SSO)?

Users must authenticate themselves to access pages protected by a web application, and if a user accesses multiple web applications, they must be authenticated. You must log in to each application separately.

Single Sign-on using ASP.NET MVC and ASP.NET CORE

Interested in using single sign-on (SSO) for your ASP.NET MVC app? You're in the right place. There are many reasons to use SSO for custom apps owned by the same organization.

  • Improved user experience.
  • Reduce development time.
  • Improved security.

These are all good reasons.

Another thing I like about SSO is that it allows me to update large code bases in small increments instead of all at once.

As? Suppose you want to migrate an app written in ASP.NET MVC 5 to ASP.NET Core MVC. Instead of rewriting everything at once, you can migrate one service at a time. By implementing SSO between two apps, you can effectively connect the two apps as if they were one app.

This tutorial simulates such a scenario by implementing his SSO in an MVC 5 app and a .NET Core app. Along the way, you'll also learn about the differences in how the two platforms implement authentication.

Find the ASP.NET MVC 5 App

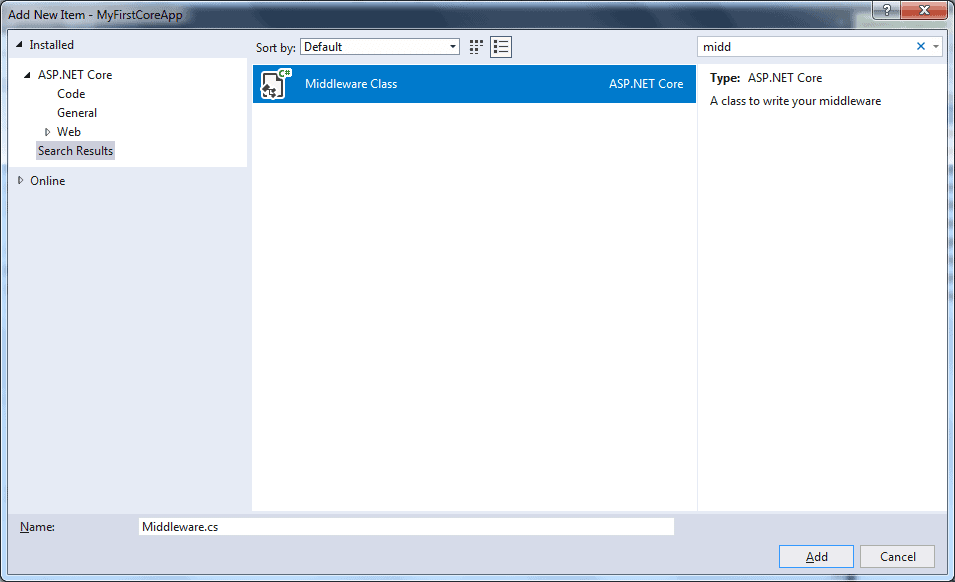
Access an existing MVC 5 app from GitHub instead of building a project from scratch. Clone or download this project (https://github.com/oktadev/aspnet-mvc-crud-example) and open the solution in Visual Studio.

Web.config file has some app settings used by programmers to configure authentication with the Open ID Connect server provided by Okta:

<add key="okta:ClientId" value="{yourClientId}" />
<add key="okta:ClientSecret" value="{yourClientSecret}" />
<add key="okta:OktaDomain" value="https://{yourOktaDomain}" />
ASP.NET (C#)

For this tutorial, you'll need to switch these values ​​to your own Okta instance. Sign in to your Okta domain if you already have an account, or sign up for a forever free developer account if you don't already have one.

After signing in to Okta, register your client application.

  • Click Applications on the top menu.
  • Click Add Application.
  • Select Web and click Next.
  • Enter SSO MVC 5 for Name.
  • For the Grant type allowed check the Implicit (Hybrid) checkbox
  • And last click on DONE

The application has been created, but we still need to add something. Select Edit and add http://localhost:8080/Account/PostLogout to the logout redirect URI list and click Save.

On the next screen, you will see a summary of your settings. Under the General Settings section, you will see the Client Credentials section. Update the SSO settings in Web.config with your client ID and client secret. Next, go to the main page of your Okta dashboard, copy the organization URL shown in the top left corner, and paste it into Okta.

OktaDomain app settings in Web.config.

At this point, you should be able to run your app and sign in and out using OpenID Connect. If you're interested, take a look at Startup.cs to see how the authentication middleware is configured.

Find the ASP.NET Core App

Now that you're using Okta to log into your MVC 5 app, adding SSO to your second app is trivial.

First, download or clone this .NET Core app from GitHub.(https://github.com/oktadeveloper/okta-aspnetcore22-crud-example) If opening in Visual Studio, change the debug target from IIS Express to LiveMusicFinder.

This will run your app through the Kestrel web server on port 5001 (for https).

Go back to your Okta admin panel and register this application.

  • click on Applications at top of the menu
  • Then click on Add Application
  • And select Web and click Next
  • Enter SSO Core MVC for the Name
  • Replace Base URIs with https://localhost:5001/
  • Replace Login redirect URIs with https://localhost:5001/authorization-code/callback
  • Click Done

Once complete, you'll be taken to the General Settings tab of the app. In this tab, click the Edit button and add an entry to the Signout Redirect URI as https://localhost:5001/signout/callback.

Then click Save.

Copy the Client ID and Client Secret from the Client Credentials section of the next page and update your application's appsettings.json file.

"Okta": {
  "ClientId": "{yourClientId}",
  "ClientSecret": "{yourClientSecret}",
  "OktaDomain": "https://{yourOktaDomain}",
  "PostLogoutRedirectUri": "https://localhost:5001/"
},
ASP.NET (C#)

While editing the settings, update the OktaDomain settings to match what you entered in your MVC 5 app's Web.config. Also change the PostLogoutRedirectUri to https//local host:5001/.

That's really it. When you sign in to either app, click the Sign In link in the other app to automatically sign you in without prompting for your password.

(If you're inexplicably testing this using Internet Explorer and Visual Studio's auto-launch feature, make sure you're opening her second app in a tab in her window in the first browser. . Each browser window is isolated from the others due to Visual Studio's habit of launching IE.)

How single sign-on works in ASP.NET MVC 5 and ASP.NET Core

We've seen how easy it is to enable SSO in two ASP.NET apps, but what's really going on behind the scenes to make it work?

Suppose you first navigate to App 1 and click Sign In. App 1 redirects to Okta IdP (Identity Provider) where it signs in. When you log in, a cookie from Okta's domain is set in your browser. This cookie keeps you logged into Okta. Okta then returns to App 1 with the token it uses to complete the sign-in process. At this point, her cookie is also set on the App 1 domain. Here's a diagram to explain the states:

Then open app 2 in another tab in the same browser. Click Sign In and you will be redirected back to the Okta IdP. However, this time we still have a valid cookie, so we are already logged into the IdP. So instead of showing a login screen, Okta simply redirects to App 2 with the token needed to complete the local login process. A cookie is set on the domain of app 2 and you can log in from anywhere.

Note that Single sign-out_ is not supported by Okta as of this writing. When you log out of App 1, the cookies in App 1 are deleted and a quick call is made to the Okta IdP, which deletes the cookies. However, the App 2 cookie remains and you remain signed in to App 2 until you click Sign Out or the cookie expires. The default expiration is 30 days.

Explain ASP.NET OpenID Connect Flow

As you may have noticed, when I set up the configuration for my MVC 5 app I had to check the box to enable the implicit (hybrid) grant type, but not for .NET Core apps was.

When the OpenID Connect middleware was written for his MVC 5 years ago (long time ago in the software world), the OpenID Connect hybrid flow was implemented. This flow requires the IdP to pass an authorization code and ID token to the MVC 5 app submission. When redirecting the user to your app.

When the OpenID Connect middleware was written for .NET Core, it implemented a more secure authorization code flow. In this case the IdP should only return an authorization code and the middleware should get the ID token via a backchannel request to his IdP. This means that the ID token is not exposed to browsers. Note that if you pass sensitive information in an ID token, in MVC 5 this token will be returned to your app via the browser. This is not a problem when enabling SSO for him for .NET Core apps.

Add Custom Middleware In ASP.Net Core 6 App | RAJESH GAMI

 Custom Middleware in ASP.Net Core 6 App

What is Middleware?

Middleware is software embedded in the app pipeline that processes requests and responses. ASP.NET Core provides a rich set of built-in middleware components, but in some scenarios, you may need to write custom middleware.

Let's see with a practical example

Learn how to create your own custom middleware and add it to your ASP.NET Core application's request pipeline.

A custom middleware component is like any other .NET class with an Invoke() method. However, the constructor needs her RequestDelegate type parameter to execute the following middlewares in order:

Visual Studio includes templates for creating standard middleware classes. To do this, right-click the project or folder where you want to create the middleware class and select Add -> New Item. This will open the Add New Item popup. In the top right search box, search for the word "middleware" as shown below.

Logging Infrastructure .NET Core

Select the class and give it a name and then click on Add.

This will look as shown below. (Middleware class added with extension method)

// You may need to install the Microsoft.AspNetCore.Http.Abstractions package into your project
public class MyMiddleware {
    private readonly RequestDelegate _next;
    public MyMiddleware(RequestDelegate next) {
        _next = next;
    }
    public Task Invoke(HttpContext httpContext) {
        return _next(httpContext);
    }
}
// Extension method used to add the middleware to the HTTP request pipeline.
public static class MyMiddlewareExtensions {
    public static IApplicationBuilder UseMyMiddleware(this IApplicationBuilder builder) {
        return builder.UseMiddleware < MyMiddleware > ();
    }
}
C#

As mentioned above, the Invoke() method is not asynchronous. So change it to asynchronous and write your custom logic before calling next();

//------------------------- Async Middleware :Rajesh Gami-----------------------
public class MyMiddleware {
    private readonly RequestDelegate _next;
    private readonly ILogger _logger;
    public MyMiddleware(RequestDelegate next, ILoggerFactory logFactory) {
        _next = next;
        _logger = logFactory.CreateLogger("MyMiddleware");
    }
    public async Task Invoke(HttpContext httpContext) {
        _logger.LogInformation("MyMiddleware executing..");
        await _next(httpContext); // calling next middleware
    }
}
// Extension method used to add the middleware to the HTTP request pipeline.
public static class MyMiddlewareExtensions {
    public static IApplicationBuilder UseMyMiddleware(this IApplicationBuilder builder) {
        return builder.UseMiddleware < MyMiddleware > ();
    }
}
C#

Add Custom Middleware

Next, we need to add our custom middleware to the request pipeline using an extension method as shown below.

Add Middleware into Request Pipeline:

//************ Startup.cs *************
public void Configure(IApplicationBuilder app, IHostingEnvironment env) {
    app.UseMyMiddleware();
    app.Run(async (context) => {
        await context.Response.WriteAsync("Hello Rajesh Gami!");
    });
}
C#

You can also add middleware using the IApplicationBuilder 's app.UseMiddleware() method.

Therefore, you can add custom middleware to your ASP.NET Core application.

Azure Active Directory(AD) Authentication Using ASP.Net Core 6 | RAJESH GAMI

 Azure Active Directory(AD) Authentication using Asp.Net Core 6

What is Azure Active Directory?

Azure Active Directory (Azure AD) is a cloud-based identity and access management service. The service helps employees access external resources such as his Microsoft 365, Azure portal, and thousands of other SaaS applications. Azure Active Directory also helps you access internal resources such as apps on your corporate intranet or cloud apps developed for your own organization. Learn more about creating a tenant for your organization.

Who is using Azure AD?

Azure AD is intended for:

  • IT Admin
    As an IT administrator, you use Azure AD to control access to apps and app resources based on your business needs. For example, you can use Azure AD to require multi-factor authentication when accessing critical corporate resources. You can also use Azure AD to automate user provisioning between your existing Windows Server AD and cloud apps such as Microsoft 365. Finally, Azure AD automatically protects user identities and credentials and provides powerful tools to meet your access control needs. First, sign up for a 30-day free trial of Azure Active Directory Premium.
  • App developer
    App developers can use Azure AD as a standards-based approach to adding single sign-on (SSO) to their apps, allowing them to work with users' existing credentials. Azure AD also provides APIs that you can use to create personalized app experiences using your existing enterprise data. First, sign up for a 30-day free trial of Azure Active Directory Premium. See also Azure Active Directory for developers for more information.
  • Microsoft 365, Office 365, Azure, or Dynamics CRM Online subscribers
    As a subscriber, I'm already using Azure AD. All Microsoft 365, Office 365, Azure, and Dynamics CRM Online tenants are automatically Azure AD tenants. Start managing access to your integrated cloud apps today.

Let's start with a practical example

First, I followed this blog to add cookie authentication to my code. It provides a login page where you can log in. The AccountController also provides some dummy user accounts that can be used to log in for testing purposes.

I then added code to the login page to provide the option to log in using AAD.

Modify the Program.cs file to add multiple authentication schemes.

Here is my code, Program.cs

using Microsoft.AspNetCore.Authentication.Cookies;
using Microsoft.AspNetCore.Authentication.OpenIdConnect;
using Microsoft.Identity.Web;
using Microsoft.Identity.Web.UI;

var builder = WebApplication.CreateBuilder(args);

//set CookieAuthenticationDefaults.AuthenticationScheme as the default authentication scheme
builder.Services.AddAuthentication(CookieAuthenticationDefaults.AuthenticationScheme)
.AddCookie(x => x.LoginPath = "/account/login");
builder.Services.AddAuthentication()
    .AddMicrosoftIdentityWebApp(builder.Configuration.GetSection("AzureAd"), OpenIdConnectDefaults.AuthenticationScheme, "ADCookies");

// Add microsoft sign in page
builder.Services.AddControllersWithViews().AddMicrosoftIdentityUI();

var app = builder.Build();

// Configure the HTTP request pipeline.
if (!app.Environment.IsDevelopment())
{
    app.UseExceptionHandler("/Home/Error");
    // The default HSTS value is 30 days. You may want to change this for production scenarios, see https://aka.ms/aspnetcore-hsts.
    app.UseHsts();
}
app.UseHttpsRedirection();
app.UseStaticFiles();
app.UseRouting();
app.UseAuthentication();
app.UseAuthorization();
app.MapControllerRoute(
    name: "default",
    pattern: "{controller=Home}/{action=Index}/{id?}");
app.Run();
C#

Note: If you have not installed any required NuGetPackage then please install NugetPackage according to the requirement 

So, see the above code and understand here I set the CookieAuthenticationDefaults.AuthenticationScheme as the default authentication scheme and also added Microsoft sign-in page see the above program.cs code and set exactly what I did.

Let's add HomeController and put the below code

using Microsoft.AspNetCore.Authentication.Cookies;
using Microsoft.AspNetCore.Authentication.JwtBearer;
using Microsoft.AspNetCore.Authorization;
using Microsoft.AspNetCore.Mvc;
using System.Diagnostics;
using WebAppMvcCookieAuthAad.Models;

namespace WebAppMvcCookieAuthAad.Controllers
{
    [AllowAnonymous]
    public class HomeController : Controller
    {
        /// <summary>
        /// Added By Rajesh Gami
        /// </summary>

        public IActionResult Index()
        {
            return View();
        }

        [Authorize]
        public async Task<IActionResult> ConfidentialDataAsync()
        {
            return View();
        }
    }
}
C#

In the next step we have to add a Model class, So let's add two models LoginModel and UserModel as shown below. 

please create two separate model LoginModel and UserModel

using System.ComponentModel.DataAnnotations;

namespace WebAppMvcCookieAuthAad.Models
{
    public class LoginModel
    {
        [Required]
        [Display(Name = "Username")]
        public string UserName{get;set;}
        [Required]
        [DataType(DataType.Password)]
        public string Password{get;set;}
        public bool RememberLogin{get;set;}
        public string ReturnUrl{get;set;}
    }
}

namespace WebAppMvcCookieAuthAad.Models
{
    public class UserModel
    {
        public int UserId { get; set; }
        public string Username { get; set; }
        public string Password { get; set; }
        public string Role { get; set; }
    }
}
C#

Now add the below code into AccountController (Create new AccountController if not created) 

using Microsoft.AspNetCore.Authentication.Cookies;
using Microsoft.AspNetCore.Authentication;
using Microsoft.AspNetCore.Mvc;
using System.Security.Claims;
using WebAppMvcCookieAuthAad.Models;

namespace WebAppMvcCookieAuthAad.Controllers
{
    public class AccountController : Controller
    {
        public List<UserModel> users = null;
        public AccountController()
        {
            users = new List<UserModel>();
            users.Add(new UserModel()
            {
                UserId = 1,
                Username = "Tiny",
                Password = "123",
                Role = "Admin"
            });
            users.Add(new UserModel()
            {
                UserId = 2,
                Username = "Other",
                Password = "123",
                Role = "User"
            });
        }
        public IActionResult Login(string ReturnUrl = "/")
        {
            LoginModel objLoginModel = new LoginModel();
            objLoginModel.ReturnUrl = ReturnUrl;
            return View(objLoginModel);
        }
        [HttpPost]
        public async Task<IActionResult> Login(LoginModel objLoginModel)
        {
            if (ModelState.IsValid)
            {
                var user = users.Where(x => x.Username == objLoginModel.UserName && x.Password == objLoginModel.Password).FirstOrDefault();
                if (user == null)
                {
                    ViewBag.Message = "Invalid Credential";
                    return View(objLoginModel);
                }
                else
                {
                    var claims = new List<Claim>() {
                    new Claim(ClaimTypes.NameIdentifier, Convert.ToString(user.UserId)),
                        new Claim(ClaimTypes.Name, user.Username),
                        new Claim(ClaimTypes.Role, user.Role),
                        new Claim("FavoriteDrink", "Tea")
                    };
                    var identity = new ClaimsIdentity(claims, CookieAuthenticationDefaults.AuthenticationScheme);
                    var principal = new ClaimsPrincipal(identity);
                    await HttpContext.SignInAsync(CookieAuthenticationDefaults.AuthenticationScheme, principal, new AuthenticationProperties()
                    {
                        IsPersistent = objLoginModel.RememberLogin
                    });
                    return LocalRedirect(objLoginModel.ReturnUrl);
                }
            }
            return View(objLoginModel);
        }
        public async Task<IActionResult> LogOut()
        {
            await HttpContext.SignOutAsync(CookieAuthenticationDefaults.AuthenticationScheme);
            return LocalRedirect("/");
        }
    }
}
C#

Here you can see I have added the Login action method, In this method, I added the required code so please add the code as mine.

So,need to add one view under the Login action post method. Add view and put the below code 

View >> Account >>Login.cshtml:

@model WebAppMvcCookieAuthAad.Models.LoginModel
@{
    ViewData["Title"] = "Login";
    Layout = "~/Views/Shared/_Layout.cshtml";
}
<h2>Login</h2>
<hr />
<div class="row">
    <div class="col-md-4">
        <form asp-action="Login">
            <div asp-validation-summary="ModelOnly" class="text-danger"></div>
            @if (!string.IsNullOrEmpty(ViewBag.Message))
            {
                <span class="text-danger">
                    @ViewBag.Message
                </span>
            }
            @Html.HiddenFor(x => x.ReturnUrl)
            <div class="form-group">
                <label asp-for="UserName" class="control-label"></label>
                <input asp-for="UserName" class="form-control" />
                <span asp-validation-for="UserName" class="text-danger"></span>
            </div>
            <div class="form-group">
                <label asp-for="Password" class="control-label"></label>
                <input asp-for="Password" class="form-control" />
                <span asp-validation-for="Password" class="text-danger"></span>
            </div>
            <div class="form-group">
                <div class="checkbox">
                    <label>
                        <input asp-for="RememberLogin" /> @Html.DisplayNameFor(model => model.RememberLogin)
                    </label>
                </div>
            </div>
            <div class="form-group">
                <input type="submit" value="Login" />
            </div>
        </form>
    </div>
</div>

<div>
    <label>sign in with aad</label>
    <a asp-area="MicrosoftIdentity" asp-controller="Account" asp-action="SignIn">Sign in with aad</a>
</div>
ASP.NET (C#)

And in the next step need to add some view code into  ConfidentialData.cshtml,  (If not created view please add view under Home)

View -> Home -> ConfidentialData.cshtml

@if(User.Identity.IsAuthenticated){
    <table>
        @foreach (var item in User.Claims)
        {
            <tr><td>@item.Type</td><td>@item.Value</td></tr>
        }
    </table>
}
ASP.NET (C#)

Now the most important part is to add one partial view that we use as a layout for our AD login process. 

Please don't forget to add this partial view under the shared folder.

View -> Shared -> _LoginPartial.cshtml

@using System.Security.Principal

<ul class="navbar-nav">
    @if (User.Identity.IsAuthenticated)
    {
        <li class="nav-item">
            <span class="navbar-text text-dark">Hello @User.Identity.Name!</span>
        </li>
        <li class="nav-item">
            <a class="nav-link text-dark" asp-controller="Account" asp-action="LogOut">log out</a>
        </li>
        @*asp - area = "MicrosoftIdentity"*@
    }
    else
    {
        <li class="nav-item">
            <a class="nav-link text-dark" asp-controller="Account" asp-action="Login">log in</a>
        </li>
    }
</ul>
ASP.NET (C#)

So now almost the code is done just need to add some AD configuration keys into the appsetting.json file

appsetting.json

{
  "AzureAd": {
    "Instance": "https://login.microsoftonline.com/",
    "Domain": "tenant_name",
    "TenantId": "tenant_id",
    "ClientId": "azure_ad_app_id",
    "ClientSecret": "azure_ad_client_secret",
    "CallbackPath": "/home", //don't forget to set redirect url in azure
    "SignedOutCallbackPath ": "/signout-callback-oidc"
  },
  "Logging": {
    "LogLevel": {
      "Default": "Information",
      "Microsoft.AspNetCore": "Warning"
    }
  },
  "AllowedHosts": "*"
}
C#

Azure Active Directory(AD) Authentication using Asp.Net Core 6

This code worked fine on my side and allowed me to login with cookie auth and aad. I noticed that @User.Identity.Name doesn't show my username after signing in with aad. However, the login flow actually succeeds.

For a better understanding please set all the code as mine and run the application and try to login with AD please use a debugger for better understanding.

If you have any queries or something else please feel free to contact me at my email id rmgami93@gmail.com or comment here.

RAJESH GAMI - Blog

Digital Signature Pad in Angular | RAJESH GAMI

  What is Signature Pad? Signature Pad could be a JavaScript library for drawing fancy signatures. It supports HTML5 canvas and uses variabl...